Posted on
November 30, 2018
by
Fabrizio Zenone
I have sold a property at 1255 CHARTER HILL DR in Coquitlam.
GREAT, PRIVATE FAMILY HOME in Coquitlam, backing onto greenbelt and Scott Creek. Close to all levels of schools - Scott Creek Middle and Gleneagle Secondary are all a block away. Close to bus and the Coquitlam Crunch to get in your morning workout. Extended deck with covered area, perfect for entertaining! Spacious living room features crown moulding, wood-burning fireplace and bay window. Recently repainted. 4 large bedrooms upstairs, including spacious master with ensuite, new laminate flooring and 3 pc ensuite. Downstairs has separate entry. Many updates, great TV/rec room downstairs.
Posted on
November 30, 2018
by
Fabrizio Zenone
I have sold a property at 203 2655 MARY HILL RD in Port Coquitlam.
FANTASTIC, 2 BEDROOM CONDO IN CENTRAL LOCATION! Situated in the heart of Port Coquitlam, you are one block away from the West Coast Express and bus station! Also close to shops, schools, library and upcoming $132 million recreation complex. Fully rainscreened and only 12 units. Spacious, bright kitchen with island and maple shaker cabinets opens into inviting living room with electric fireplace. 9 foot ceilings throughout with lots of windows. Sliding doors open onto balcony. Master bedroom is upstairs, features ensuite with both shower and bathtub, in addition to large walk-in closet. 2nd bedroom also has its own ensuite. Includes 1 covered parking in private, shared garage and individual locker.
Posted on
November 30, 2018
by
Fabrizio Zenone
Please visit our Open House at 1911 IRONWOOD CRT in Port Moody. Open House on Saturday, December 1, 2018 2:00PM - 4:00PM Live in quiet, Mountain Meadows cul-de-sac! Well-maintained Tudor style 3 bedroom + den & 3 bathroom home. Enter into bright sky lit foyer. Living room features beautiful floor to ceiling wood burning fireplace and adjoins with the formal dining room. Bright kitchen features quartz countertops and stainless steel appliances. Family room has a cozy gas fireplace with sliding doors to the private patio outside. Upstairs features 3 bedrooms, den and 2 bathrooms. Low maintenance yards in the front and back. View of Fraser River and Mount Baker. CLose to all levels of schools, shopping and recreation. Open House Sat Dec 1, 2-4
Posted on
November 29, 2018
by
fab zenone
Every need and lifestyle is addressed in a variety of floorplans, each with 9-foot ceilings and featuring plenty of natural light and space. Once you have found an ideal layout, personalize it for your tastes by selecting from two beautiful colour palettes. Interior living seamlessly transitions to private outdoor decks, where views and fresh air are always enjoyable. Appreciate the art of entertaining or a quiet afternoon watching Netflix – homes are designed for all elements of life.


Posted on
November 29, 2018
by
Fabrizio Zenone
I have sold a property at 302 530 NINTH ST in New Westminster.
Modern TOP FLOOR CORNER 2 bedroom in Moody Park/Uptown! Fully renovated - Insuite laundry & dishwasher, quartz counters, tile backsplash, flat-panel cabinetry, stainless steel appliances, undermount sinks, gorgeous flooring, doors, bathroom, tub, toilet, vanity, heated bathroom floor, paint, recessed lighting & MUCH more! BIG covered balcony, big pantry, lots of closets, & TONS of natural light. Spacious layout & big rooms (bring your HOUSE SIZED furniture)! Separate dining area. Lobby & common areas renovated. Secure parking, big locker, elevator. Pets & rentals OK. Boutique 14 suite building steps to Moody Park, Royal Centre Mall, shops, cafes, & so much more. OPEN HOUSE CANCELLED
Posted on
November 26, 2018
by
ROSA ZENONE

Come to Place des Arts’ free, all-ages celebration of cultural diversity and discover how our cultural traditions and customs are entwined over the holiday season.
Over a warm cup of tea, learn how to tell your story and hear the inspiring stories of others in a storytelling tea salon, led by First Nations spoken word artist Molly Billows. Make lanterns inspired by those from the main cultural groups that populate Coquitlam: China, Iran, Korea and the West, and enjoy live music performances and other fun surprises.
Admission is free. All ages welcome.
Visit Place des Arts for more information.
‘Tis the season!
Join us for the annual Skate with Santa on Dec. 16 at the Poirier Sport and Leisure Complex. The big man in red will be donning a pair of skates for some fun, on-ice activities from 11-12:30 p.m., 12:45-2:15 p.m. and 2:30-4 p.m. There will be free hot chocolate to warm up with after!
Note: There will be a family rate for Skate with Santa. Rentals are not included.
Celebrate the holidays at Glen Pine Pavilion with festive music and performances by Glen Pine's talented entertainers.
Date: Sunday, Dec. 16, 2018
Time: 1:30-3:30 p.m.
Price: Tickets: $8 (children six and under $3)
All ages event
Join us for a family afternoon with Santa! We'll keep you busy with crafts, snacks, story time and great opportunities with Santa, as well as lots of active play with your family. | Register Now
Date: Sunday, Dec. 16
Time: 2 – 4 p.m. OR 4 – 6 p.m.
Cost: $2.00/person
Location: Poirier Community Centre
Let's fill Lafarge Lake with the sound of music! Sing along with caroling groups as you stroll around the lake.
At 7:30 p.m. everyone will stop where they are and join in a community sing-a-long of Jingle Bells. Rain or shine!
Learn about more pop-up events with Coquitlam's Park Spark staff and volunteer team at coquitlam.ca/parkspark.
Coquitlam Heritage welcomes you to join us in celebrating our 2018-2019 exhibit Heirlooms & Treasures. Music, performance and food along with exhibit tours will highlight the traditions, customs and objects that our community holds dear. No Registration Required.
Posted on
November 23, 2018
by
Fabrizio Zenone
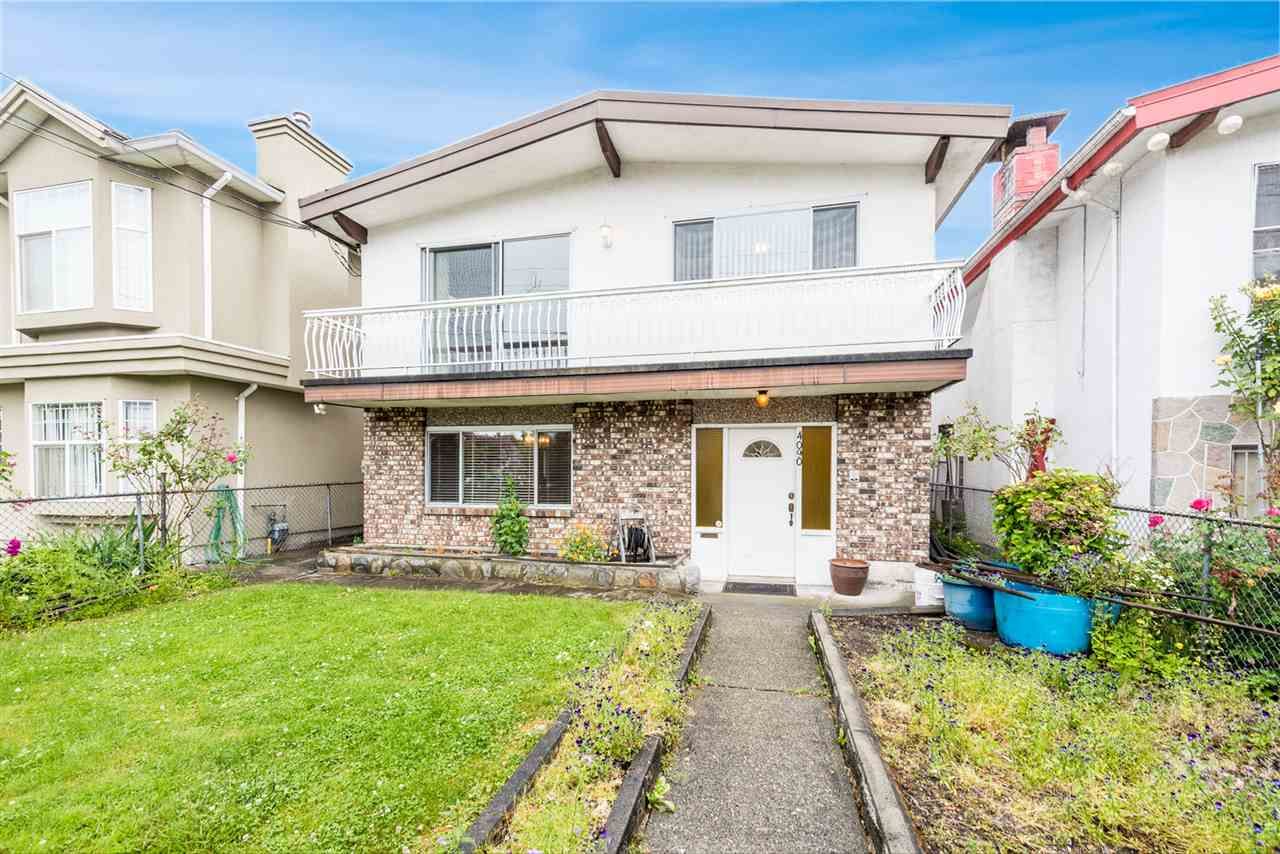
I have sold a property at 4090 PERRY ST in Vancouver.
Vancouver Special!! Property currently zoned RM-1; potential to be rezoned into row homes. 3 bedrooms on main floor. 2 bedroom suite downstairs. Newer roof. Great location - close to public transportation, shopping, restaurants and recreation. Don't miss out!
Posted on
November 22, 2018
by
Fabrizio Zenone
Please visit our Open House at 1635 SUFFOLK AVE in Port Coquitlam. Open House on Saturday, November 24, 2018 2:00PM - 4:00PM FULLY RENOVATED 6 bedroom, 3 bathroom home incl. your choice of 1, 2, or 3 bedroom ground level mortgage helper with private entrance, renovated kitchen & bath, new flooring, new fireplace & in-suite laundry. Upstairs features open plan living, three spacious bedrooms including master with NEW spa-inspired ensuite & walk-in closet, NEW kitchen with quartz countertops, island w/ beverage cooler and 5 burner gas range w/ double oven & pot filler. NEW lighting, paint and flooring including engineered hardwood throughout the upstairs. NEW landscaping with fenced yard and 2 storage sheds. Loads of parking including room for your RV or boat. Close to all levels of schools, parks, bus, recreation and shopping. COME READY TO BE WOWED!
Posted on
November 22, 2018
by
Fabrizio Zenone
Please visit our Open House at 3 2150 SALISBURY AVE in Port Coquitlam. Open House on Saturday, November 24, 2018 2:00PM - 4:00PM Looking to upgrade? The time is NOW! Spectacular, 4 bedroom, 4 bathroom townhouse with many great detail-oriented features. Huge modern kitchen with centre island, quartz countertops, spice drawer, spacious pantry and toe-kick vacuum in kitchen. Built-in surround sound in living room and speakers in kitchen and dining areas of the main floor, great for entertaining! 3 bedrooms upstairs, including master bedroom with ensuite and walk-in closet. Additional bedroom and bathroom downstairs on ground level - perfect for guests! Family-oriented neighbourhood. Close to shopping, restaurants, bus, schools, dog park, 25 km Traboulay trail along the Coquitlam River and parks.
Posted on
November 22, 2018
by
Fabrizio Zenone
Please visit our Open House at 103 2985 PRINCESS CRES in Coquitlam. Open House on Sunday, November 25, 2018 2:00PM - 4:00PM Beautiful, bright 2 bedroom, 2 bathroom GROUND FLOOR unit at Princess Gate. Vibrant retirement community for adults 55+ in safe & secure building. Kitchen features newer S/S appliances. Engineered maple hardwood flooring throughout. Living room features built-in wall unit with electric fireplace & surround sound. French doors from living room opens into second bedroom. Includes 2 parking close to elevator & storage locker close to unit. Lovely, private view of courtyard - great, private outdoor space for entertaining & BBQ's in the spring & summer with access to green space. Within walking distance to Coquitlam Centre, access to Evergreen Line at Lafarge Lake skytrain station, Hoy Creek, Lafarge Lake, library, recreation centre, & many parks & trails close by.
Posted on
November 15, 2018
by
Fabrizio Zenone
I have listed a new property at 1122 HOWSE PL in Coquitlam.
INVESTOR & BUILDER ALERT! FANTASTIC LOCATION - close to all levels of schools. Rochester Elementary is a 10 minute walk, Maillard Middle is a 5 minute walk and Centennial Secondary is a short drive or bus away. Close to bus stop, shopping, restaurants, movie theatre and recreation. Super close to Rochester Park, which includes preservation of existing wooded areas, water park and a climbing wall. Peek-a-boo views of the Fraser River. Newer roof, sundeck and exterior paint. Currently rented to long-term tenants.
Posted on
November 15, 2018
by
Fabrizio Zenone

Every house will acquire holes in the walls throughout its life. Whether it is a small hole from a painting you re-located or a larger hole from an accident, fixing a hole in the wall is a relatively straightforward process. Here are seven steps to fix a hole in the wall in your house.
Step 1 - Prep Surface
Start by cleaning around the hole and making sure any loose drywall or paint is removed. You want to get the surface around the hole as smooth as possible so that the patching compound will get the best adhesion. Sand around the perimeter of the hole to remove as much excess drywall as possible.
Step 2 - Patch Small Holes

For holes smaller than 1/2 inch in diameter, you do not need a bridging compound. You can simply fill the hole with some spackle or plaster and use your putty knife to smooth out. Once the compound is dry, sand it and repeat the process until the wall is smooth. After that, you can use a texture spray to mimic the existing wall and paint.
Step 3 - Add Hole Patch
If the hole is larger than 1/2 inch, then you need a hole patch to smooth out the surface. Start by placing the patch over the hole to determine the size of the patch. You want to leave 1/2 inch extra all the way around the hole. Once the patch has been cut, take off the backing paper and install the patch over the hole. Try and get the edges of the patch as smooth as possible before proceeding. If the adhesive fails to stick, use a wet sponge to apply the patch. You can also use some patching compound around the edges to secure it in place.
Step 4 - Apply Patching Compound
With the patch in place, add the patching compound with your putty knife. Start by applying the compound around the edges of the patch, working your way inward. Ensure the patch is completely covered with the compound before stopping. Most compounds will dry a different color when they are fully dry. If the hole is fairly large, you may need to work in sections, allowing each one to partially dry before continuing. This will help keep the mesh in place and provide extra support for the middle of the patch. Try and get the compound as smooth as possible before it dries as this will cut down on sanding.
Step 5 - Sand

You should let the compound dry overnight before sanding. When you start sanding, do not stop until the edges of the patch are in line with the outer wall. This will help blend everything together when you paint. Once the sanding is complete, clean the area with a damp cloth and let it dry for about 15 minutes. While the wall dries, clean up any access dust or particles that were created during the sanding process.
Step 6 - Prep for Paint
Depending on the style of the wall, you should use a textured spray prior to painting. The spray should match the existing wall’s texture, so you may need to adjust the thickness until you get it just right. Once the texture is on, allow it to dry overnight before painting.
Step 7 - Paint
Getting the paint to match might be the hardest part of fixing a hole in the wall. If you do not have the original paint, you can remove a few chips and take it down to your local hardware store to get it matched. Once you have the right paint, simply paint over the patched surfaced and allow it to dry for around six hours. If you do not want to go through the trouble of matching the paint, you can repaint the entire wall a new color.
Posted on
November 15, 2018
by
Fabrizio Zenone
Please visit our Open House at 103 2985 PRINCESS CRES in Coquitlam. Open House on Sunday, November 18, 2018 11:00AM - 1:00PM Beautiful, bright 2 bedroom, 2 bathroom GROUND FLOOR unit at Princess Gate. Vibrant retirement community for adults 55+ in safe & secure building. Kitchen features new S/S appliances. Engineered maple hardwood flooring throughout. Living room features built-in wall unit with electric fireplace & surround sound. French doors from living room opens into second bedroom. Includes 2 parking close to elevator & storage locker close to unit. Lovely, private view of courtyard - great, private outdoor space for entertaining & BBQ's in the spring & summer with access to green space. Within walking distance to Coquitlam Centre, access to Evergreen Line at Lafarge Lake skytrain station, Hoy Creek, Lafarge Lake, library, recreation centre, & many parks & trails close by. Open Sun Nov 18th, 11am-1pm.
Posted on
November 15, 2018
by
Fabrizio Zenone
Please visit our Open House at 1911 IRONWOOD CRT in Port Moody. Open House on Sunday, November 18, 2018 2:00PM - 4:00PM Live in quiet, Mountain Meadows cul-de-sac! Well-maintained Tudor style 3 bedroom + den & 3 bathroom home. Enter into bright sky lit foyer. Living room features beautiful floor to ceiling wood burning fireplace and adjoins with the formal dining room. Bright kitchen features quartz countertops and stainless steel appliances. Family room has a cozy gas fireplace with sliding doors to the private patio outside. Upstairs features 3 bedrooms, den and 2 bathrooms. Low maintenance yards in the front and back. View of Fraser River and Mount Baker. CLose to all levels of schools, shopping and recreation. Open House Sunday November 18th, 2pm to 4pm.
Posted on
November 14, 2018
by
Fabrizio Zenone
Please visit our Open House at 1310 SHAUGHNESSY ST in Coquitlam. Open House on Saturday, November 17, 2018 2:00PM - 4:00PM Perfect home for families - 3 good-sized bedrooms upstairs on main floor with spacious kitchen, eating area, dining room and living room with balcony. Newly repainted, new hardwood flooring, kitchen appliances and washer/dryer all recently replaced in 2018. Double pane windows and roof replaced 2017. Downstairs includes large office/den that can be used as additional bedroom. Bright rec room and flex area facing the back. Private fenced yard and patio in the back. Close to Coquitlam River, Coquitlam River Elementary, Crystal Falls Trail and shopping. OPEN HOUSE Saturday, November 17th from 2:00pm to 4:00pm.
Posted on
November 10, 2018
by
Fabrizio Zenone
I have listed a new property at 22 MACDONALD AVE in Burnaby.
PRICED WELL BELOW ASSESSMENT VALUE! CENTRAL LOCATION in Vancouver Heights! Build your dream home - flat 61 x 100' lot. Steps to St. Helens Church and Gilmore Elementary.
Posted on
November 8, 2018
by
Fabrizio Zenone
Please visit our Open House at 103 2985 PRINCESS CRES in Coquitlam. Open House on Saturday, November 10, 2018 1:00PM - 3:00PM Beautiful, bright 2 bedroom, 2 bathroom GROUND FLOOR unit at Princess Gate. Vibrant retirement community for adults 55+ in safe and secure building. Kitchen features new S/S appliances. Engineered maple hardwood flooring throughout. Living room features built-in wall unit with electric fireplace and surround sound. French doors from living room opens into second bedroom. Includes 2 parking close to elevator and storage locker close to unit. Lovely, private view of courtyard - great, private outdoor space for entertaining and BBQ's in the spring and summer with access to green space. Within walking distance to Coquitlam Centre, access to Evergreen Line at Lafarge Lake skytrain station, Hoy Creek, Lafarge Lake, library, recreation centre, and many parks and trails close by.
Posted on
November 7, 2018
by
Fabrizio Zenone
I have listed a new property at 103 2985 PRINCESS CRES in Coquitlam.
Beautiful, bright 2 bedroom, 2 bathroom GROUND FLOOR unit at Princess Gate. Vibrant retirement community for adults 55+ in safe and secure building. Kitchen features new S/S appliances. Engineered maple hardwood flooring throughout. Living room features built-in wall unit with electric fireplace and surround sound. French doors from living room opens into second bedroom. Includes 2 parking close to elevator and storage locker close to unit. Lovely, private view of courtyard - great, private outdoor space for entertaining and BBQ's in the spring and summer with access to green space. Within walking distance to Coquitlam Centre, access to Evergreen Line at Lafarge Lake skytrain station, Hoy Creek, Lafarge Lake, library, recreation centre, and many parks and trails close by.
Posted on
November 6, 2018
by
Fabrizio Zenone
I have sold a property at 804 ALDERSIDE RD in Port Moody.
Waterfront 6 Bedroom South facing home. Very well built just 30 years old, but the first time for sale in 80 years. Floor plan flows well and maximizes the amazing Water Views. Lovely deck, patio and lawn area on the water side. Also there is a float and boat ramp at the shore with prepaid lease. This quality built well maintained home has many extras. It is wheelchair friendly and has a lift servicing all three levels, two master bedrooms with one on the main floor, even a "dumb waiter" to service the summer kitchen downstairs. There is a chef's kitchen with gas cooktop, double ovens and an eating bar. Air conditioning, double garage and almost 5,000 sq. ft. make this the perfect family home. Great area and exposure, check it out.
Posted on
November 6, 2018
by
Fabrizio Zenone
I have listed a new property at 1310 SHAUGHNESSY ST in Coquitlam.
Perfect home for families - 3 good-sized bedrooms upstairs on main floor with spacious kitchen, eating area, dining room and living room with balcony. Newly repainted, new hardwood flooring, kitchen appliances and washer/dryer all recently replaced in 2018. Double pane windows and roof replaced 2017. Downstairs includes large office/den that can be used as additional bedroom. Bright rec room and flex area facing the back. Private fenced yard and patio in the back. Close to Coquitlam River, Coquitlam River Elementary, Crystal Falls Trail and shopping.
Categories:
Albion, Maple Ridge Real Estate
|
Anmore, Port Moody Real Estate
|
Arbutus, Vancouver West Real Estate
|
Barber Street, Port Moody Real Estate
|
Bear Creek Green Timbers, Surrey Real Estate
|
Belcarra, Port Moody Real Estate
|
Bolivar Heights, North Surrey Real Estate
|
Brentwood Park, Burnaby North Real Estate
|
Brookswood Langley, Langley Real Estate
|
Burke Mountain, Coquitlam Real Estate
|
Burnaby Hospital, Burnaby South Real Estate
|
Canyon Springs, Coquitlam Real Estate
|
Cape Horn, Coquitlam Real Estate
|
Capitol Hill BN, Burnaby North Real Estate
|
Central Coquitlam, Coquitlam Real Estate
|
Central Lonsdale, North Vancouver Real Estate
|
Central Meadows, Pitt Meadows Real Estate
|
Central Park BS, Burnaby South Real Estate
|
Central Pt Coquitlam, Port Coquitlam Real Estate
|
Chilliwack W Young-Well, Chilliwack Real Estate
|
Chineside, Coquitlam Real Estate
|
Citadel PQ, Port Coquitlam Real Estate
|
Cloverdale BC, Cloverdale Real Estate
|
College Park PM, Port Moody Real Estate
|
Coquitlam East, Coquitlam Real Estate
|
Coquitlam West, Coquitlam Real Estate
|
Downtown NW, New Westminster Real Estate
|
Eagle Ridge CQ, Coquitlam Real Estate
|
East Central, Maple Ridge Real Estate
|
Elgin Chantrell, South Surrey White Rock Real Estate
|
Fairview VW, Vancouver West Real Estate
|
Fleetwood Tynehead, Surrey Real Estate
|
Forest Hills BN, Burnaby North Real Estate
|
Fraserview VE, Vancouver East Real Estate
|
Glenayre, Port Moody Real Estate
|
GlenBrooke North, New Westminster Real Estate
|
Glenwood PQ, Port Coquitlam Real Estate
|
Government Road, Burnaby North Real Estate
|
Grandview Surrey, South Surrey White Rock Real Estate
|
Guildford, North Surrey Real Estate
|
Harbour Place, Coquitlam Real Estate
|
Hastings, Vancouver East Real Estate
|
Heritage Mountain, Port Moody Real Estate
|
Heritage Woods PM, Port Moody Real Estate
|
Highgate, Burnaby South Real Estate
|
Holly, Ladner Real Estate
|
Killarney VE, Vancouver East Real Estate
|
Kitsilano, Vancouver West Real Estate
|
Lincoln Park PQ, Port Coquitlam Real Estate
|
Lower Mary Hill, Port Coquitlam Real Estate
|
Lynn Valley, North Vancouver Real Estate
|
Maillardville, Coquitlam Real Estate
|
Marpole, Vancouver West Real Estate
|
Mary Hill, Port Coquitlam Real Estate
|
Mid Meadows, Pitt Meadows Real Estate
|
Mission BC, Mission Real Estate
|
Mount Pleasant VE, Vancouver East Real Estate
|
Mountain Meadows, Port Moody Real Estate
|
New Horizons, Coquitlam Real Estate
|
North Coquitlam, Coquitlam Real Estate
|
North Shore Pt Moody, Port Moody Real Estate
|
Park Ridge Estates, Coquitlam Real Estate
|
Parkcrest, Burnaby North Real Estate
|
Port Moody Centre, Port Moody Real Estate
|
Quay, New Westminster Real Estate
|
Queensborough, New Westminster Real Estate
|
Ranch Park, Coquitlam Real Estate
|
River Springs, Coquitlam Real Estate
|
Riverwood, Port Coquitlam Real Estate
|
Sapperton, New Westminster Real Estate
|
Seafair, Richmond Real Estate
|
Silver Valley, Maple Ridge Real Estate
|
Simon Fraser Univer., Burnaby North Real Estate
|
South Meadows, Pitt Meadows Real Estate
|
Southwest Maple Ridge, Maple Ridge Real Estate
|
Sperling-Duthie, Burnaby North Real Estate
|
Steveston Village, Richmond Real Estate
|
University VW, Vancouver West Real Estate
|
Upper Eagle Ridge, Coquitlam Real Estate
|
Uptown NW, New Westminster Real Estate
|
Vancouver East Real Estate
|
Vancouver Heights, Burnaby North Real Estate
|
Victoria VE, Vancouver East Real Estate
|
Websters Corners, Maple Ridge Real Estate
|
West Central, Maple Ridge Real Estate
|
West End VW, Vancouver West Real Estate
|
Westwood Plateau, Coquitlam Real Estate
|
Westwood Summit CQ, Coquitlam Real Estate
|
Whalley, North Surrey Real Estate
|
Willingdon Heights, Burnaby North Real Estate
|
Willoughby Heights, Langley Real Estate
|
Woodland Acres PQ, Port Coquitlam Real Estate
|