How to Build a Rock-Solid Concrete Planter
Posted on
January 28, 2019
by
fabrizio zenone

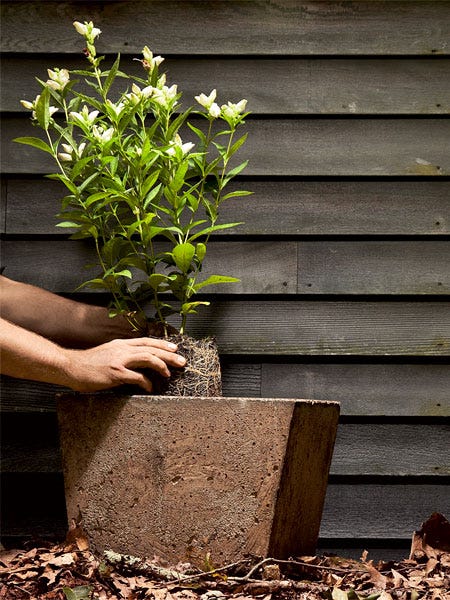
Concrete planters are a great addition to any home. Concrete is just as useful and versatile today as it was when the Romans discovered how to make it 2000 years ago. Early masons used the humble mix of cement, sand, stone, and water to build impressive structures such as the Pantheon (A.D. 126), which is still in use as a house of worship. With its stout granite columns and massive concrete dome, the Pantheon gives new meaning to "built to last."
1How to Build a Concrete Planter
2Form and Cast
Screw together the inner and outer forms. Coat the exterior of the inner form with glue, and cover the surface with aluminum foil. Do the same for the inside face of the outer form. Spray cooking oil on the foil surfaces.
Place the inner form, top-down, on the mounting board. Screw through the bottom of the board into the form's cross supports. Place the outer form over the inner one, and use angle brackets to secure the outer form to the mounting board.
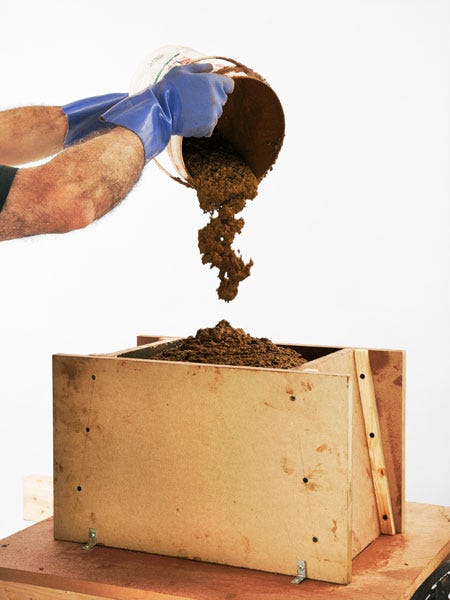
Empty an 80-pound bag of Quikrete Countertop Mix into a wheelbarrow. Add about 5 ounces of buff liquid cement color to 1 gallon of water in a bucket. Add the tinted water to the powdered concrete a couple of cups at a time until the mixture is malleable but not runny.
Pour the concrete into the form. Repeatedly plunge a scrap-wood stick into the concrete to consolidate it. Overfill the form, then run an oscillating sander (without sandpaper) over the entire form to vibrate out voids. Strike off excess concrete. Form drain holes by pushing two dowels coated with petroleum jelly through the concrete.
3Strip the Outer Form
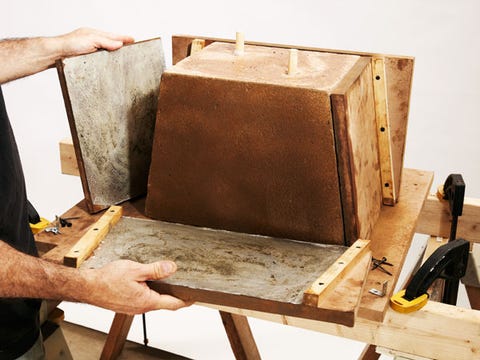
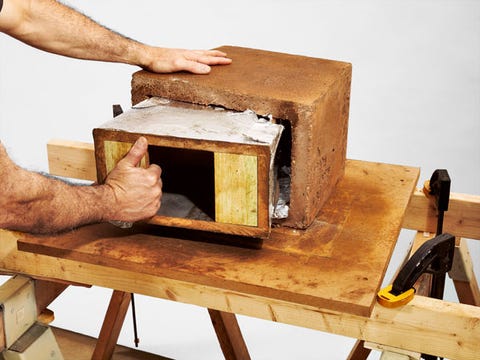
After letting the concrete set for 18 hours, unscrew and disassemble the outer form. Grab and twist out the dowels with pliers.
|

The data relating to real estate on this website comes in part from the MLS® Reciprocity program of either the Greater Vancouver REALTORS® (GVR), the Fraser Valley Real Estate Board (FVREB) or the Chilliwack and District Real Estate Board (CADREB). Real estate listings held by participating real estate firms are marked with the MLS® logo and detailed information about the listing includes the name of the listing agent. This representation is based in whole or part on data generated by either the GVR, the FVREB or the CADREB which assumes no responsibility for its accuracy. The materials contained on this page may not be reproduced without the express written consent of either the GVR, the FVREB or the CADREB.


Comments:
Post Your Comment: